Gmail Quick Links: How to Always Find Your Important Emails
Never search in vain again

The champagne is finished, the partying is done… and now it’s time to make 2017 your MOST ORGANIZED YEAR EVER!
Our crackerjack admin VAs are brainstorming to pick out their best organization tips and write them down, in easy-to-follow instructions, so you can use them, too.
Our first organizational mini-series will focus on Gmail and how you can use the hidden and not-so-hidden features of Gmail to get your business super-organized. Starting with… Quick Links!
Do you ever find yourself searching for the same email? Over and over again? Quick Links is the solution! Quick Links gives you quick access to any email by creating a link to that email.
Here’s a handy one-minute tutorial showing you how to set it up. Or, you can skip to the written instructions with screenshots below.
1. Quick Links can be enabled in your Gmail setting under Labs.
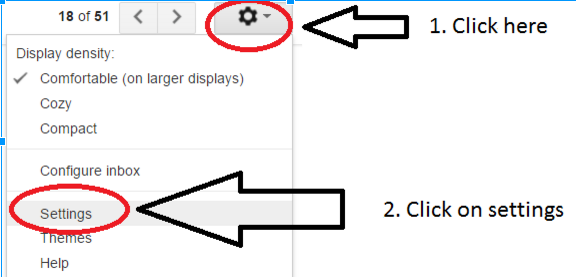
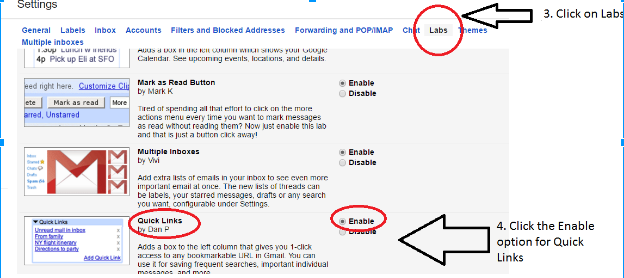
Make sure you save your changes!
2. The first time you use Quick Links, left click on the 3 little dots on the very left bottom of your screen, near the chats and hangouts.
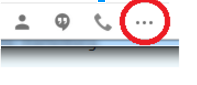
That will bring up the Quick Links on the left side of your emails.
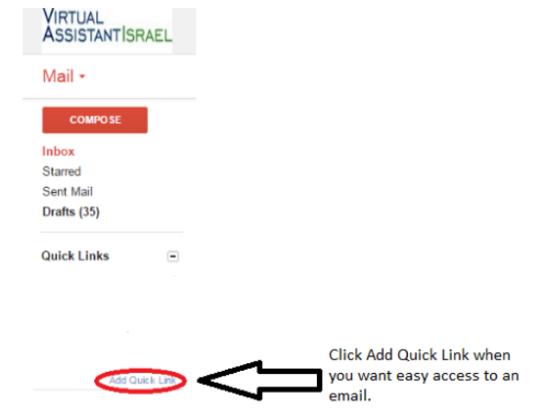
3. When you are viewing an email you want easy access to, click on the small printed words on the left hand side that say “Add Quick Links.”
4. You will get a pop up to name the email. For example, if you were reading this in an email and you wanted to save it to refer back to it, you might save as “Quick Links Instructions.”
5. Your email will be saved on the left side under Quick Links. Just click on it whenever you need it!
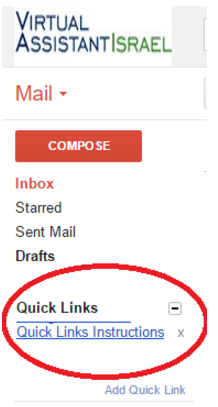
I hope you all find Quick Links as exciting and useful as I do! No more searching for emails! You can also easily remove emails in Quick Links just by clicking the X that appears right next to it.
We have more super inbox organization tips coming up (about once every two weeks), so sign up for our emails here and don’t miss any!
 Submitted by Naomi